Lego train sets have been available for decades, now. The Danish manufacturer long ago realized the magic of combining its building block sets with motors and plastic rails to create real working railways for children and adults to enjoy. Over the years, Lego has innovated through several generations of trains, from classic metal-rail systems to the more modern IR and later Bluetooth-controlled versions. The only thing largely missing over all that time, though…? A bridge!
Yes, Lego has largely neglected to build any bridges for its mainstream train lineup. There are aftermarket solutions, and innovative hacks invented by the community, all with their own limitations and drawbacks. This glaring oversight, though, seemed like a perfect opportunity to me. It was time to fire up the 3D printer and churn out a fully-realized Lego rail bridge of my very own.
Bridges Are Hard
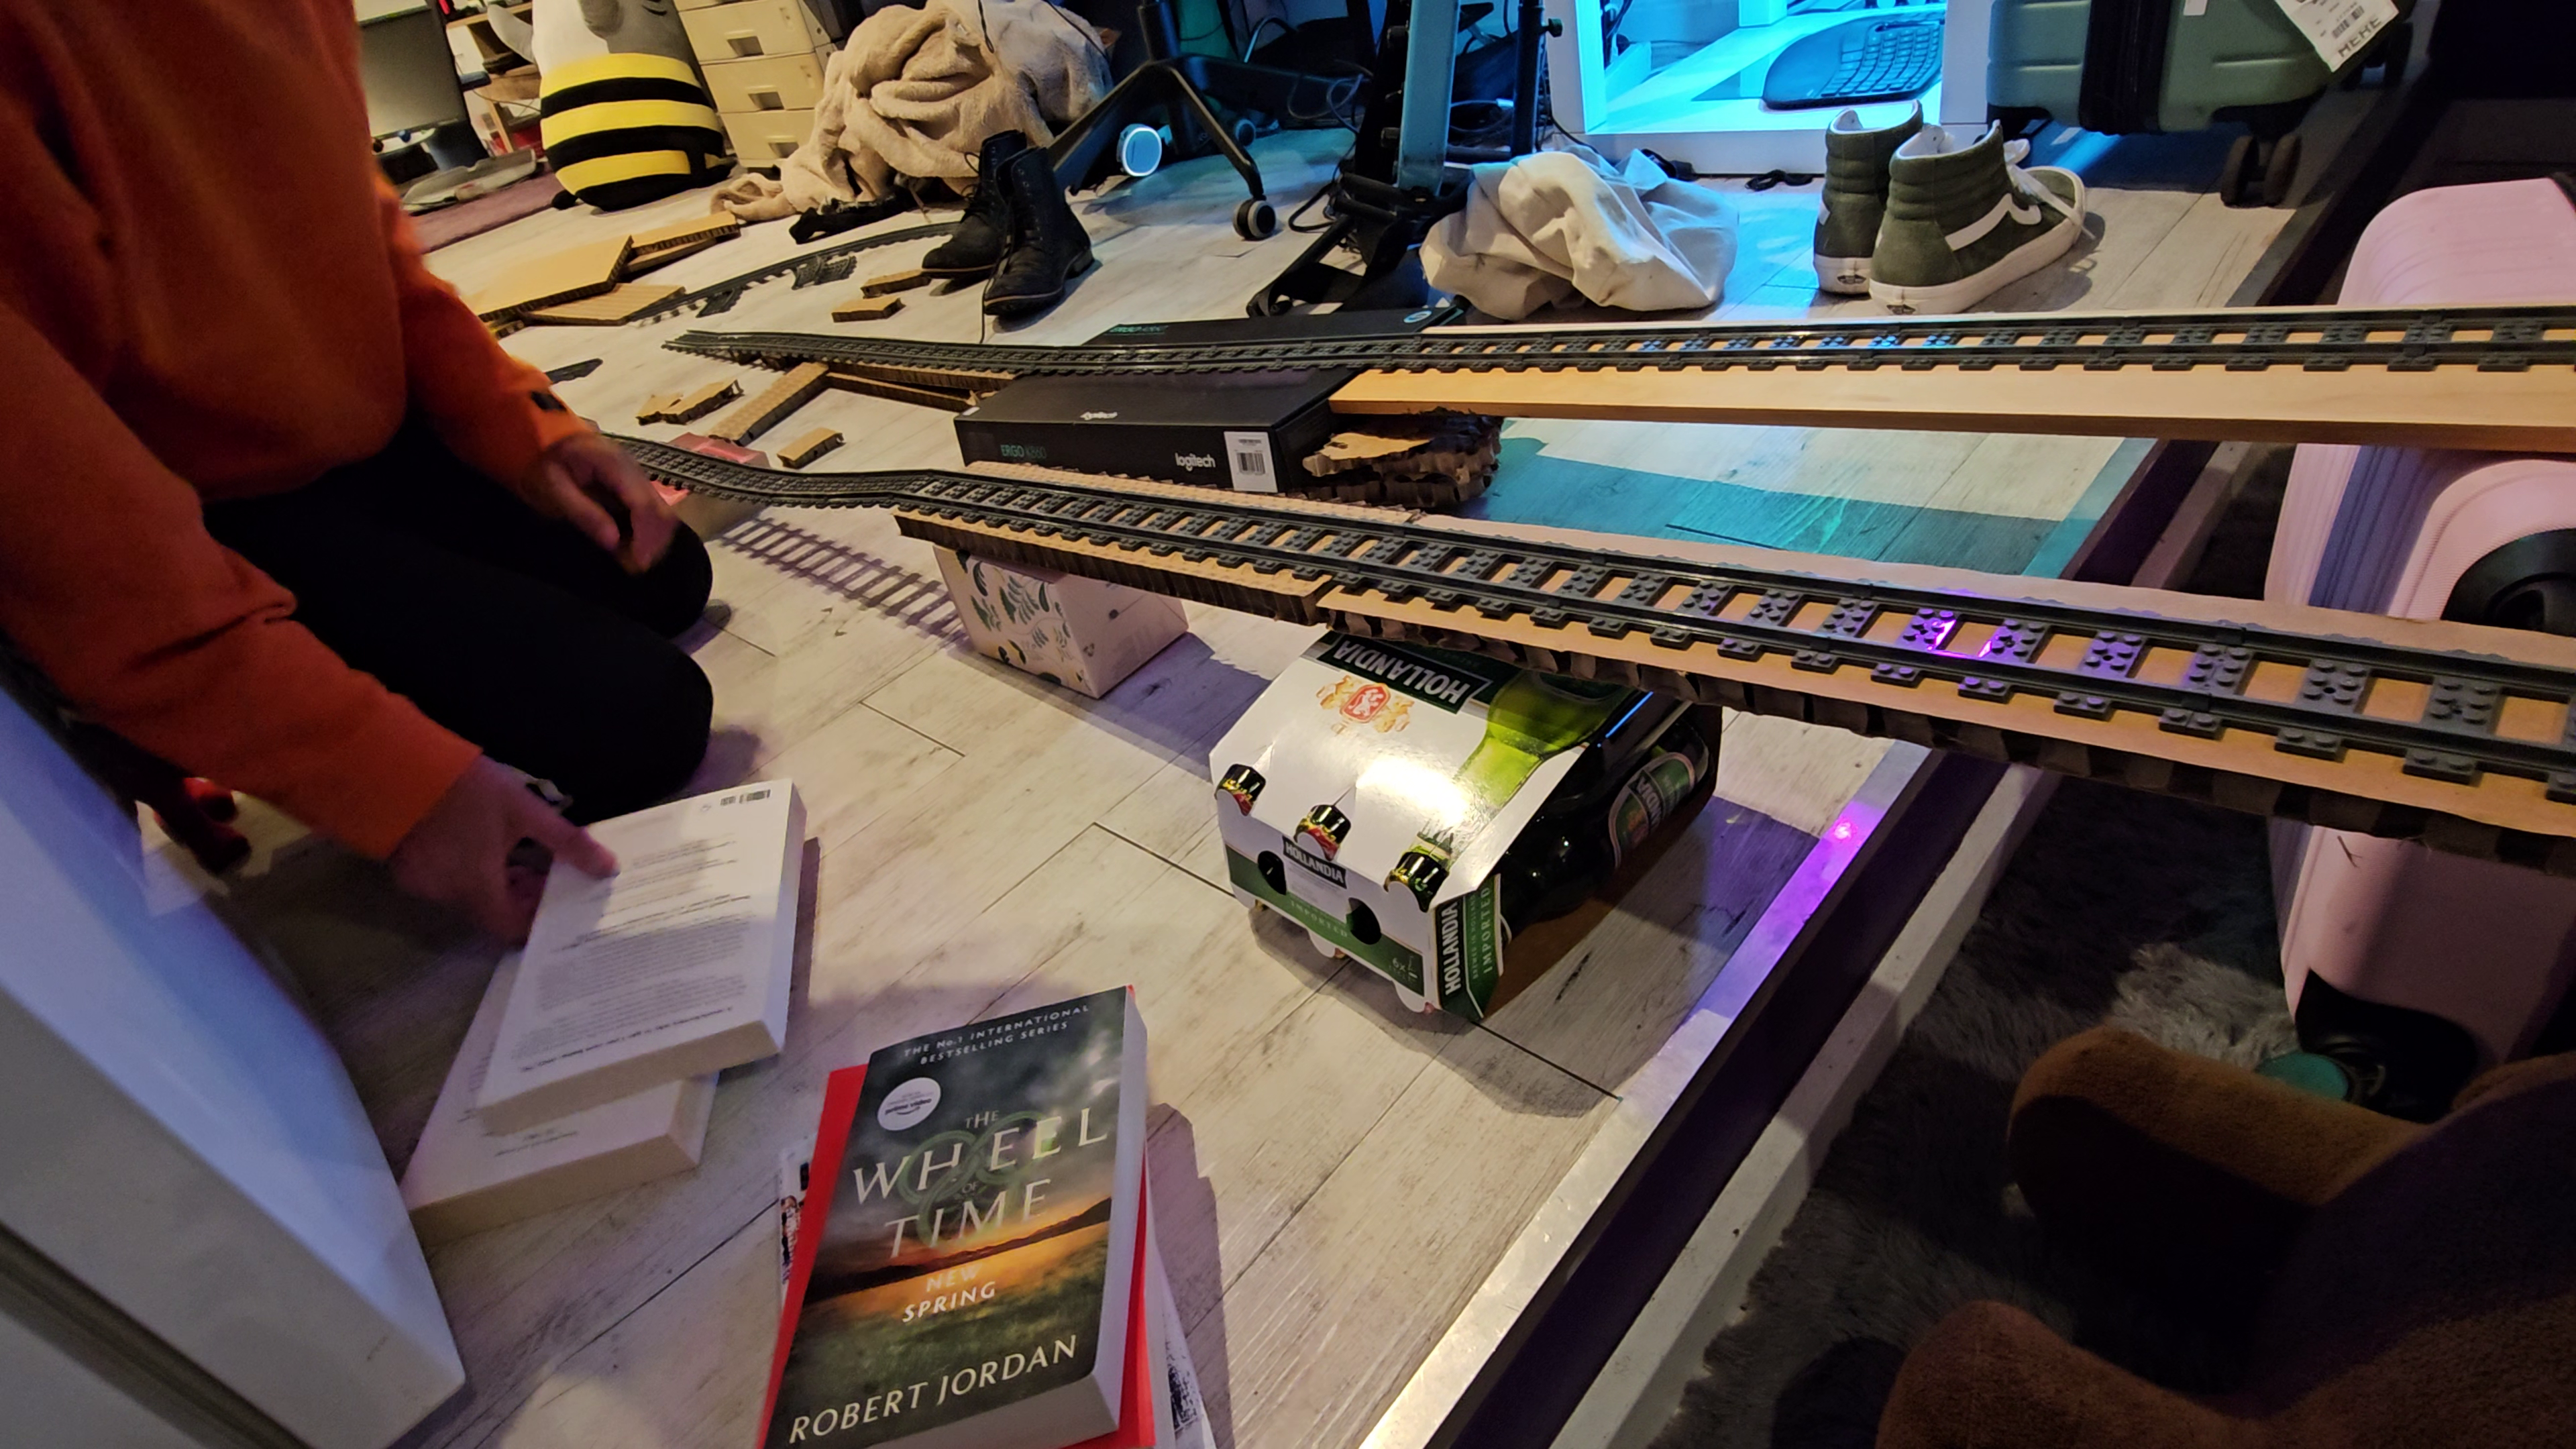
I’ve experimented with building Lego rail bridges before, using standard track and household objects like cardboard, books, and beer. Unfortunately, it can be very difficult to support the track evenly at the joints which occur every 150mm, and derailments are common. Credit: author
There’s actually a good reason Lego bridges aren’t a big thing in the company’s own product lineup, beyond a few obscure historical parts. This is probably because they aren’t very practical. Lego locomotives are not particularly strong haulers, nor do they have excellent grip on the rails, and this makes them very poor at climbing even mild grades. Any official Lego bridge would have to be very long with a shallow slope just to allow a train to climb high enough to clear a locomotive on a track below. This would end up being an expensive set that would probably prove unpopular with the casual Lego train builder, even if the diehard enthusiasts loved it.
There are third-party options available out there. However, most rely on standard Lego track pieces and merely combine them with supports that hold them up at height. This can work in some cases, but it can be very difficult to do cool things like passing a Lego train under a bridge, for example. It can be hard to gain enough height, and the short length of Lego track pieces makes it hard to squeeze a locomotive between supports.
However, none of these problems are insurmountable if you’re dedicated to the task. The trick is in being able to make entire pieces of Lego track with custom geometry to suit your exact needs. I’ve always tried to add bridges to my Lego railways, and I’ve found that trying to do so with the standard track pieces is often difficult. At just 150 mm long, they require a lot of supports, particularly at the joints, and it can be difficult to build any sort of structure that is stable enough to hold together without a train derailing across it. After many prior experiments, I figured that 3D printing bespoke bridge pieces would probably be the way to go to build a stable Lego train bridge that actually works.
Research And Development
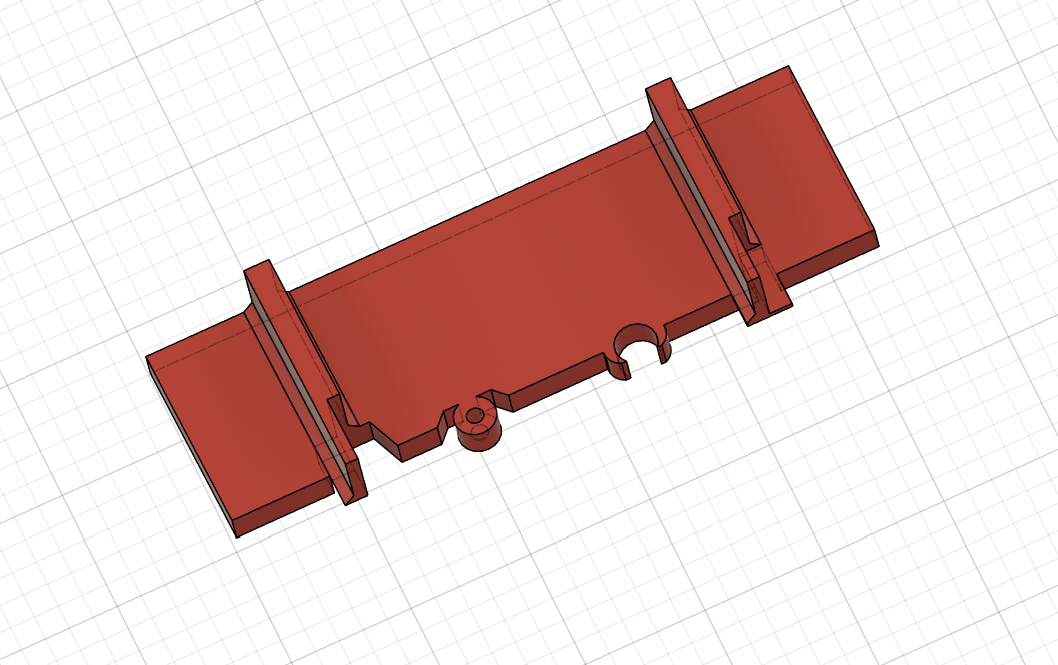
Recreating basic Lego rail geometry was task 1. Credit: author
I started my work by recreating the track geometry so that my 3D printed parts would work with official Lego track. I was able to recreate the rails and the inter-track coupler design, based on a drawing available at the L-Gauge website. From there, I began my bridge design, starting with picking the most critical number—the grade of the bridge. Having done some research on Lego trains online, combined with my own prior tests, I figured a 10 degree grade would be low enough for a Lego train to climb without too much trouble. I also wanted to make the individual bridge pieces as long as possible to reduce the number of joints involved. I landed on a figure of approximately 290 mm, as this was the largest track length I could fit by printing diagonally on my printer.
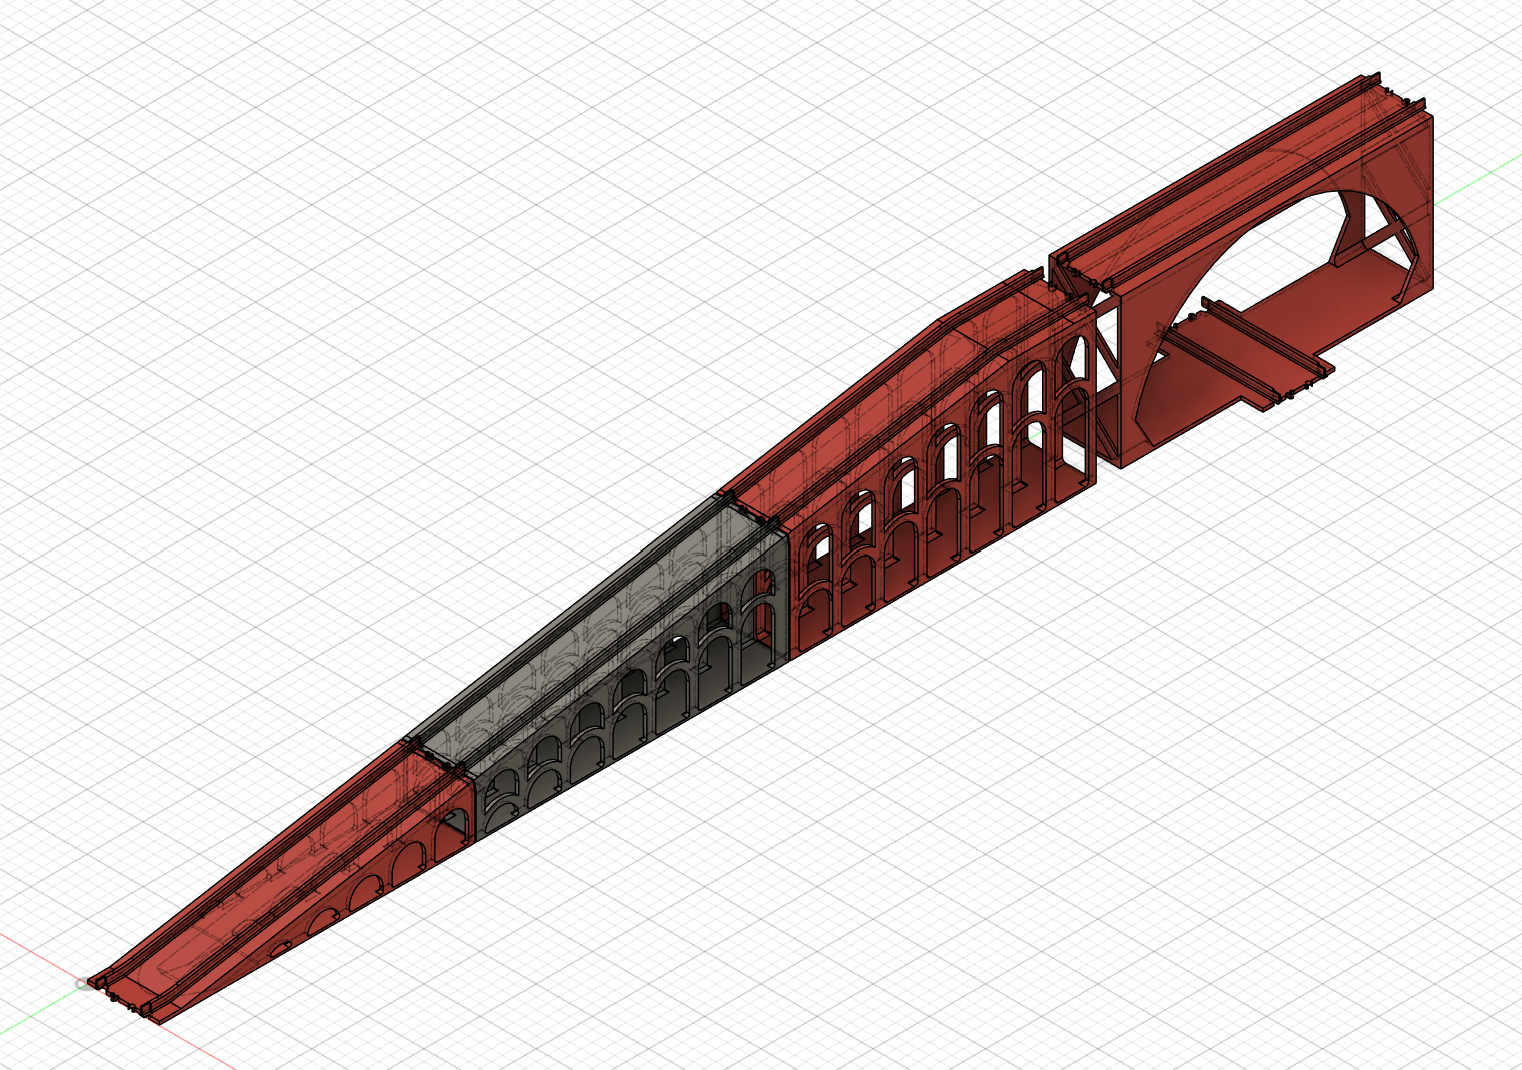
The basic bridge design. The three ramp pieces repeat on the other side. Credit: author
I quickly worked up a design that involved seven separate pieces to create a whole bridge. Three individual ramp pieces on each side, plus a central flat bridge piece that has a piece of track passing at a perpendicular angle underneath. In total, the whole bridge measures almost two meters long, mostly because Lego locomotives only like a gentle climb and it’s quite a hike to get high enough to clear a train passing below.
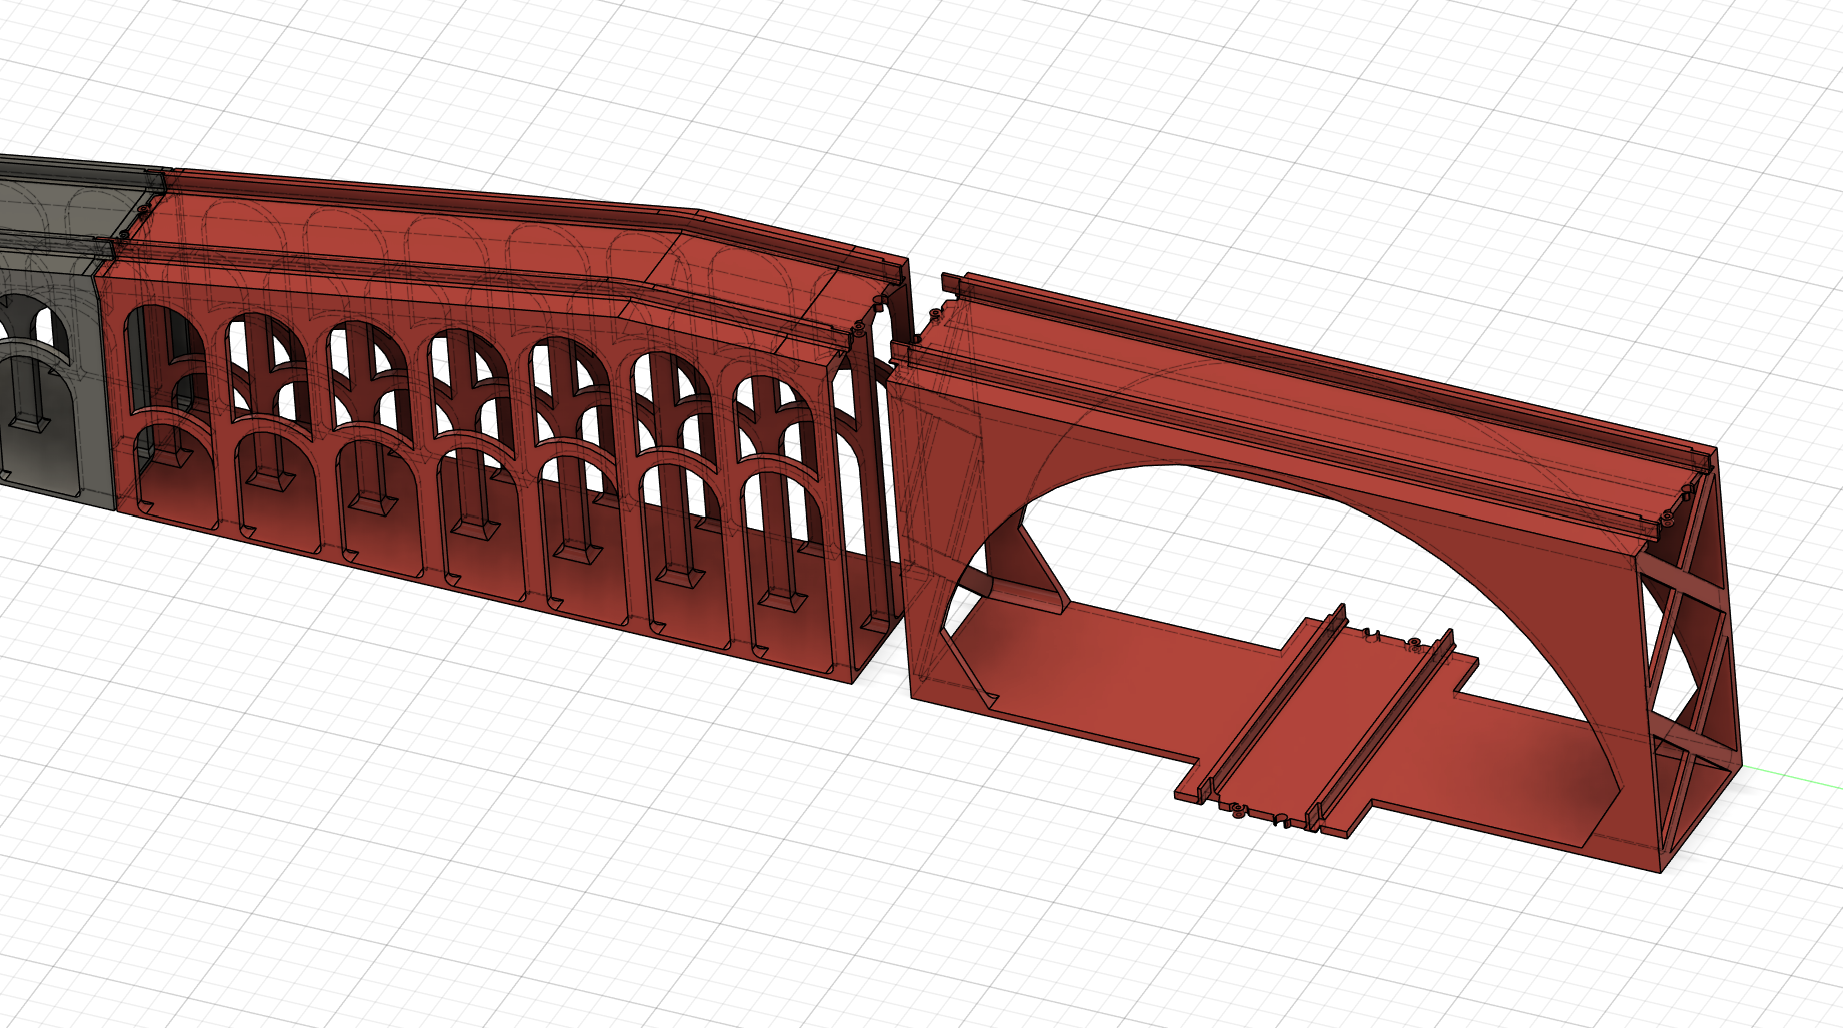
The arches and pillars are probably excessive but they allow the bridge to be printed without support. Credit: author
From the get go, I wanted to print without supports—both for speed and to save plastic. This took some experimentation, but I mostly achieved success by using arches and subtle curves to keep overhangs in check and create a structure that would print cleanly.
With that said, one might argue that the excessive amount of arches and pillars used in my design might have wasted more plastic than just using standard supports generated by the slicer. Regardless, I think the choice to go with arches gave the bridge a nice aesthetic befitting a good railway. I printed the bridge pieces in PLA at a layer height of 0.20 mm, using two-colored filament just because I could, and it was cheap at the store. While some of the diagonal stretches of the rails featured obvious layer lines, this didn’t seem to have any negative effect on performance. It did, however, give the trains a zippy sound when they climbed and descended the bridge.
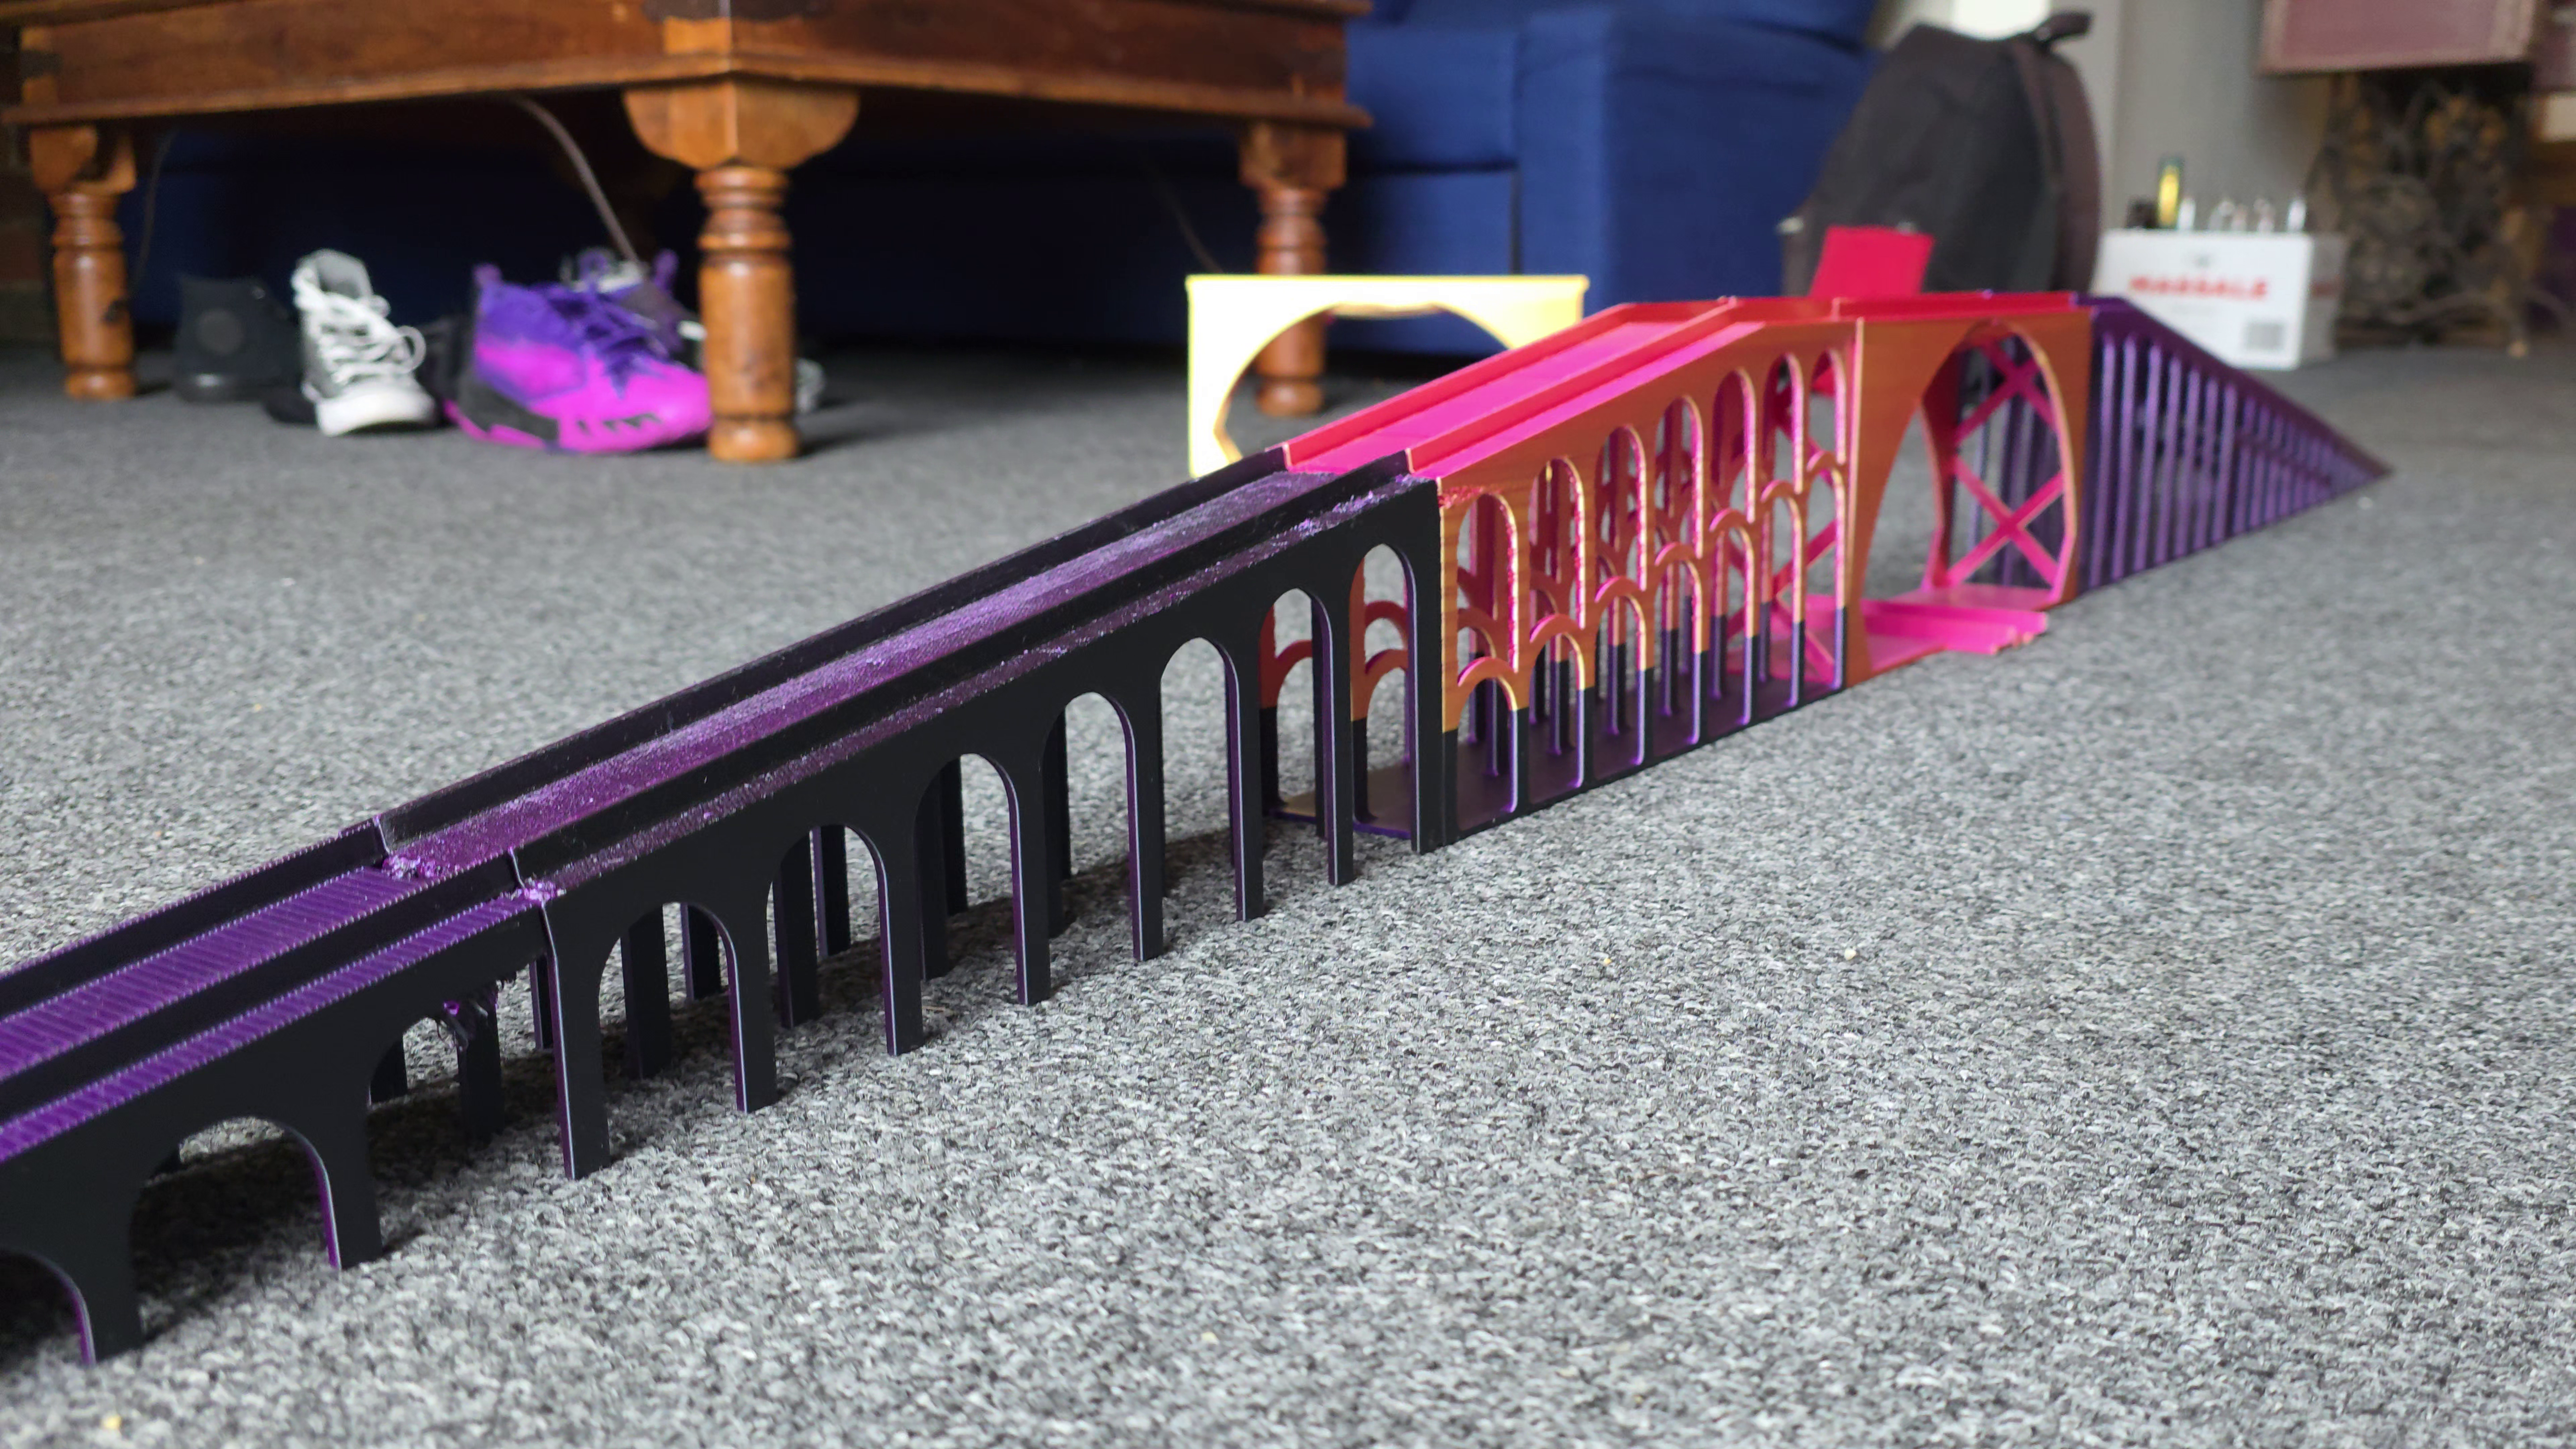
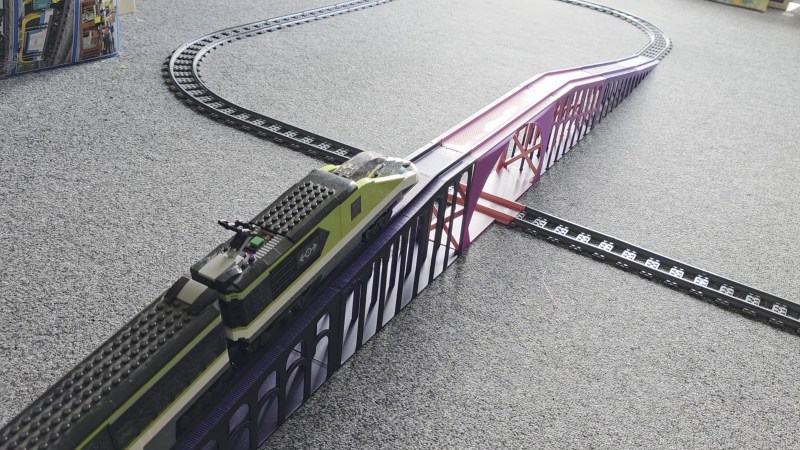
The completed bridge, prior to construction of supporting railway infrastructure. Credit: author
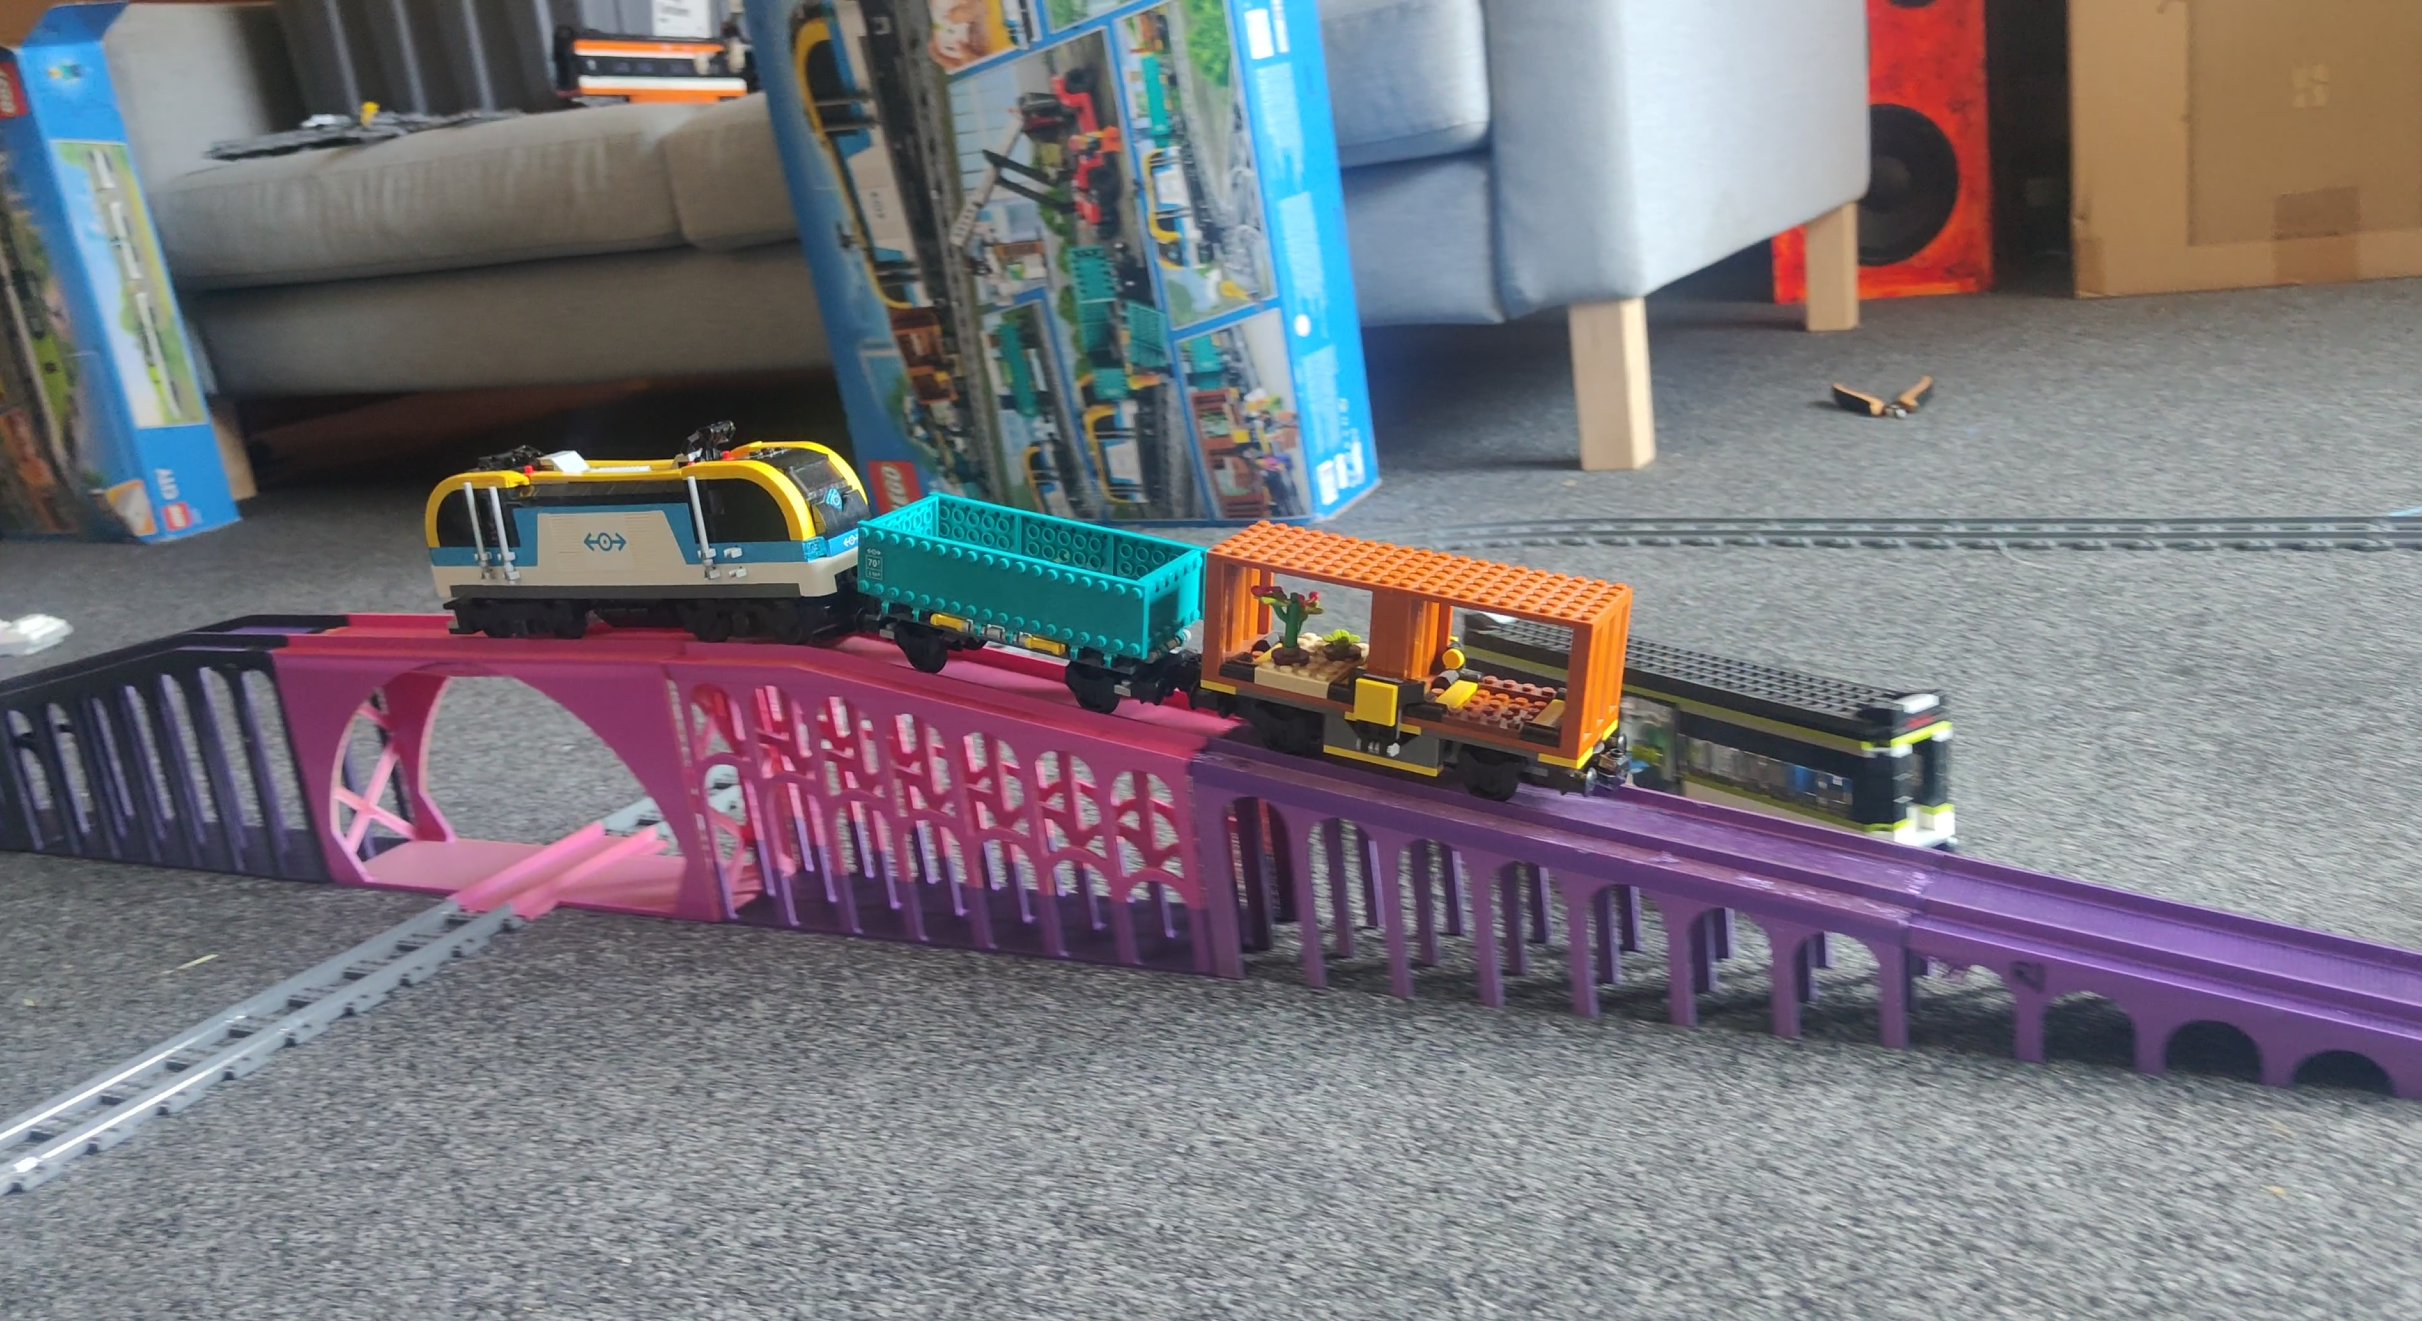
Shorter carriages work best due to the relatively sudden transition between the 10-degree grade and flat running. Credit: author
I set about testing the bridge design by inviting some friends over and building a railway in my living room. We set up a simple S-shaped loop that would allow a single train to test both the bridge itself and the passthrough track underneath. Early testing revealed some fun unexpected problems. Right off the bat, we found that one Lego locomotive had a low-slung piece that would smash into the track coupler as it came down off the bridge back on to the flat rails at ground level. Removing that piece barely compromised the look of the locomotive but enabled it to pass the bridge more easily.
We also soon found issues with carriages. Even at a subtle 10-degree grade, most Lego locomotives struggled to pull more than a single carriage up the slope. Further compounding the problem was that the momentum from the extra carriages on the downhill tended to overspeed the train and derail it at an immediately-following turn. Some carriages and locomotives were also simply incompatible with the bridge due to my design decisions. I had not paid much attention to the transitions on and off the sloped ramps. This meant that some longer carriages with wider-spread bogies would find themselves derailing as one set of wheels left the track while passing over the bridge. There were also some minor issues with the bridge pieces themselves and how they couple together. The Lego track coupling design is pretty good at snapping pieces together when they’re injection molded. It doesn’t work as well with softer 3D-printed PLA, nor is it good at locking together big heavy pieces of bridge that weigh many hundreds of grams each.
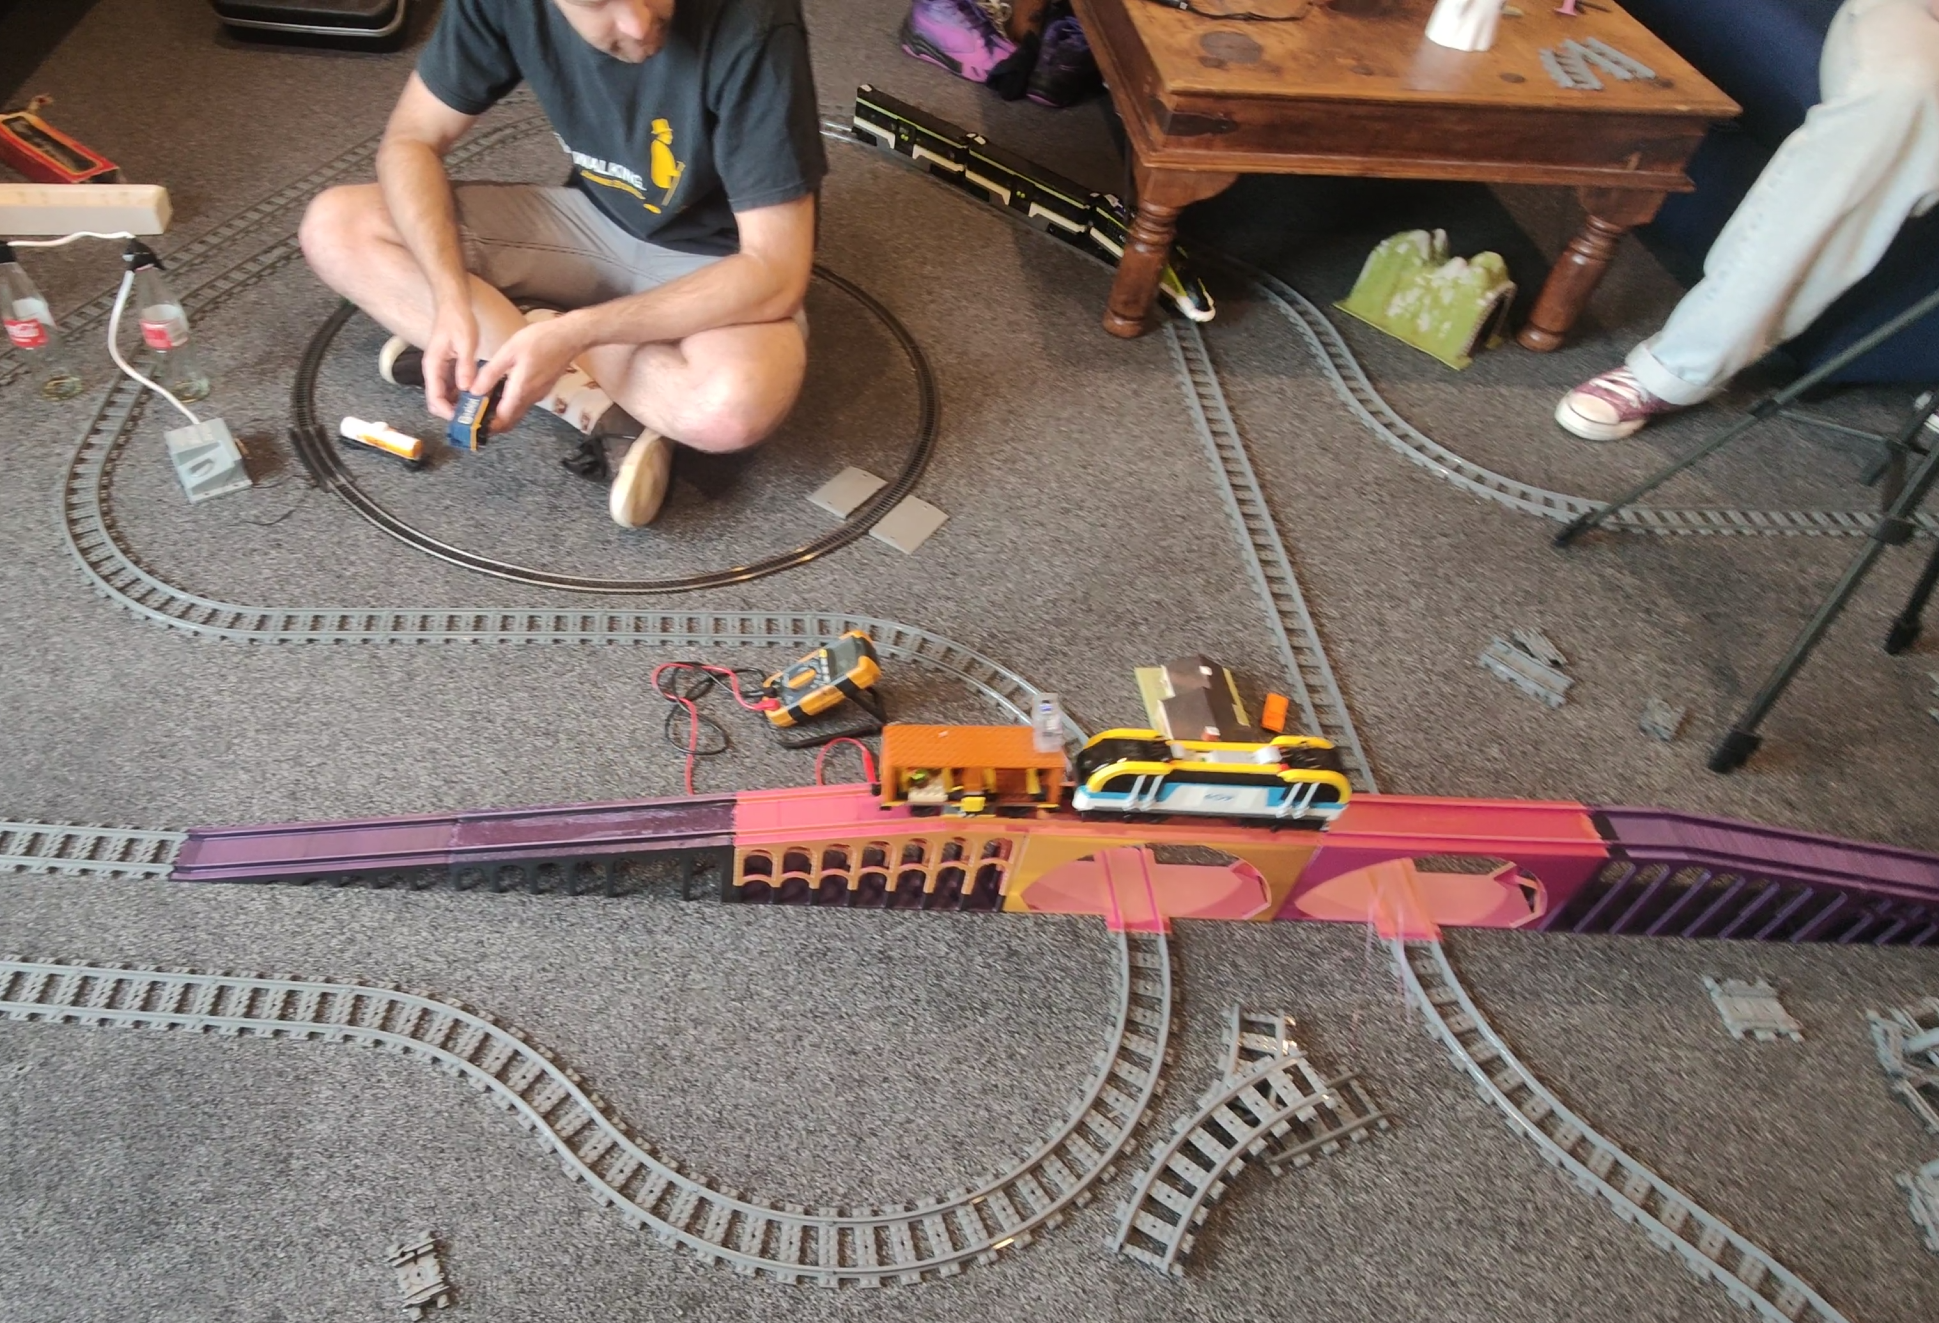
The custom bridge allows for the construction of fun new layouts that aren’t readily achievable with standard Lego parts. Credit: author
Nevertheless, the bridge design did mostly work if you were careful and only ran the right trains. With a layout built to suit the vagaries of over-bridge travel, with lots of straights for run-up and run-off, it was possible to climb and descend without too much trouble. The underpass track was also perfectly serviceable and presented precisely no problems during hours of play.
This bridge design could be easily improved. I’d probably rework the design with a lower grade—maybe 7 degrees, maybe 5—and really smooth out the transitions on and off the slope to allow as many different Lego trains to use the bridge as possible. Beyond that, it would simply be a matter of improving printability and reducing plastic use to really make this project shine. For those eager to try printing what I built, the files are available, but just be wary that your mileage, and your train’s mileage, may vary.
The fun thing about 3D printers is that they are perfect for jobs like this. If you need to make a plastic part with specific geometry, it’s now almost trivial to do. That makes recreating or innovating on things like toys or home appliances really easy, and also very fun. I had a blast designing this bridge and putting it together, and even more fun playing trains with my friends. I’d highly recommend taking a shot yourself if you feel like tinkering with Lego railways at home!