The “cheap” and “easy” way in about an hour! A question that pop’s up from time to time is “I somehow ended up with an archaic old laptop / computer, can it run Linux?” Well of course it can, but that totally depends! On what? Well machine CPU, CPU speed, hard disk space, RAM and most importantly what you are expecting it to do.
Okay, why a Intel 386? Well number one I own a 386, but more importantly its the absolute bottom Intel CPU you can run Linux on. While it wont be able to do much, it will give you a basic system to kick around and “get to know” the insides of Linux without a million things installed and the worry of breaking it.
Unfortunately a 386 requires some special moves as the actual chip was dropped from almost all distributions long ago. All of the modern distributions I have looked at require at least a 486 CPU. This tutorial will be strictly for installing a basic bare bones Linux on a 386. Have a 486? Pentium? Faster? Never fear I will be covering that in a part II later this week.
Linux on a 386 in about an hour? Madness you might think, it probably takes Linux longer to boot on a 386 (and in some cases you are correct)! Want to know the trick? Simple, cheat!
Join me after the break for the parts and steps needed to get you started.
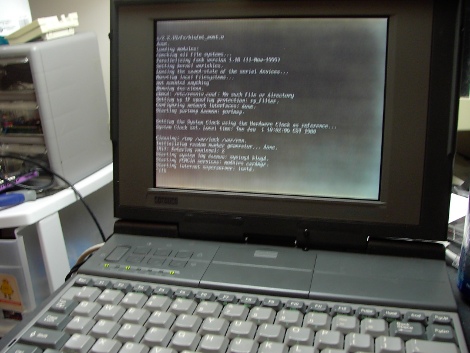
First we need a target machine, here is mine. It is a DEC PC325SL, which translates out to intel386SL (which is a 386SX CPU in a highly integrated package where much of the support hardware is also inside the chip) running at 25Mhz with 4MB of ram and 120MB of hard disk space. It also has 256K video memory and 640×480 color VGA display. If you can swing it, a 386DX CPU or a 386S(X/L) with a 387 math co-processor is recommended, no it doesn’t really matter if its an Intel, AMD, etc. It also needs an IDE disk up to 2G, sorry MFM drives.

Next we need a distribution that will actually work with a 386 CPU. This is where it gets to be confusing. Everyone still has a distribution called i386, but support for the 386 was dropped a while ago. I looked at some of my favorites, Debian, Slackware, FreeBSD, and NetBSD (which I know are not Linux but hey.) Here is what I found out:
Debian stopped support with 3 so anything earlier is ok.
Slackware stopped around the same time in release 9.
FreeBSD states that it requires a 386DX, but then says most 386 laptops are ok via math emulation, but in a more current readme it states that you need a 486 (confused?)
NetBSD says it should work on all 386′s but I never made it that far.
Well of course I am not a super Linux guru, and can really only futz around without running off to a forum or a book, so I went with Debian. Originally version 2.2 as it was the newest version that machine could run, and yes in fact it did. The problem is it took over an hour to boot with a year 2000 generic kernel and when it finally did it refused to move past the package installer.
You could spend a lot of time trimming and optimizing to get it running great, but I am facing a brutal truth here, and that is the best I could run is still over a decade out of date and its going to require a lot of work. So I just simply stepped back in time a bit further to find something a bit more appropriate.
In the end I used Debian 1.3.1, which is a mid 1990′s Linux, and that’s really the point. Use whatever you like but its going to have to be pretty old or require a ton of work, which at that point you might be better off doing it from scratch.
Tools for the cheat install:
x86 compatible Host PC with an IDE/ATA port, and a standard BIOS capable of booting into DOS. I used my dual core AMD A2X2 with a nvidia chip-set so its pretty safe to say most PC’s will. It also needs an Internet connection and some form of Linux installed or booted (I use mint)
CD ROM or USB stick you can boot from with a windows 98 emergency boot disk (EBD from here on), or since MS DOS does not know how to access USB or SATA CD ROM’s, I used a old IDE drive with a 100Mb FAT16 partition on it.
IDE to 3.5 IDE pin adapter, they are cheap and handy I suggest you have one, just make sure you plug it in correctly you can kill your drive (as in magic smoke kill).
That should do it, lets get started
Step One:
Turn off your Host PC, plug in a spare IDE hard disk set as slave. To keep my self from borking my computers main drive I went ahead and unplugged it from the SATA port. Check BIOS to make sure its detected and that your booting from your CD drive first, Insert the Windows EBD save changes and let the computer boot from the EBD.
You will see a Windows boot disk menu, choose to “start without cd rom support”. Once at the DOS prompt use FDISK to setup a 100 or so meg partition, be sure to tell FDISK no when it asks you if you want large disk support to ensure a FAT16 partition.

Exit FDISK, reboot with the EBD and use FORMAT C: (make sure that is the correct drive if you have others plugged into the system), then Eject the EBD. In my case I then plugged my SATA hard drive back in and set BIOS to boot from that disk and went on into Linux Mint, though you could leave your main drive unattached and use a live CD Linux.
I know that linux can make a FAT16 partition. I was having trouble with the EBD reading it while figuring this all out, so I just started making the partition with the OS that really needs it most.
Step Two:
Boot your Host PC into Linux, I am using (again) Linux Mint but It does not matter, it just has to be able to get on line, and mount a FAT16 partition. Point your web browser to the Debian archive and goto the following folder Debian-1.3.1/main/disks-i386/1997-10-13/
Download the following files
base1_3.tgz
resc1440.bin
drv1440.bin
linux
loadlin.exe
root.bin
and copy them to your FAT16 partition.
Optional Step:
My 386 came with 120 meg disk, That might be large enough to squeeze a basic Linux system on, but I also wanted a little room for a MS DOS partition so I upgraded to a 540 meg hard drive. Of course 386′s and other